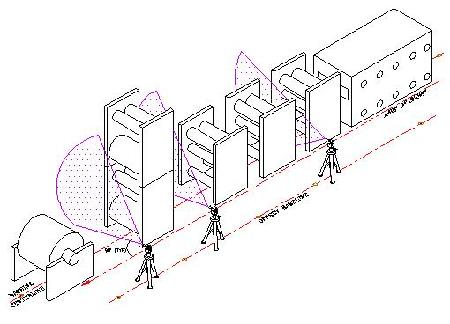
PERPENDICULAR (SQUARE) ALIGNMENT

The most common optical inspection setup when inspecting "square" conditions is shown below

PERPENDICULAR ALIGNMENT

This setup applies to rolling equipment that carries a continuous sheet or web. On this illustration, referencing is taken from an established offset baseline. (As mentioned earlier, the baseline accuracy should be verified to the machine centerline before any realignment takes place. Failure to do so could result in aligning components into a parallelogram. Using more than one reference may result in a series of parallelograms of different angles and directions.)

Optical planes are established 90 degrees from the reference. Individual components can be inspected for their square position using this 90-degree plane. Optical alignment equipment should be capable of producing this 90-degree angle within one arc second, which calculates to approximately .001″ deviation in 17 feet. Overall, roll alignment may be less then .001″ per foot of roll width if not specified by the manufacturer.